How To GPO Install the Mitel MiVoice Connect Client
This article expects the network administrator has functional knowledge of Active Directory and Group Policy Objects. Further investigation and assistance with these Microsoft components should be handled by Microsoft Support. Please contact your support organization for any concerns regarding the Mitel Connect Client portion of this article.
This article outlines the process using a Server 2012 Operating System.
1. Obtain the correct build of the Mitel Connect client which includes the required .msi file.

2. Make note of the required prerequisites as seen below and only select the ones applicable to your system.

3. Make note of the path to the .msi file used for a GPO push of the software.

4. Create a network share that includes access to both the .msi and the prerequisites folder.

5. In Group Policy Management create a new Group Policy Object by right clicking Group Policy Object then selecting "New"

6. Edit the newly created Group Policy Object by right clicking it and choosing "Edit". Within Group Policy Management Editor configure the Software Settings under Computer Configuration. From here you will right click Software Installation to add a new Package.
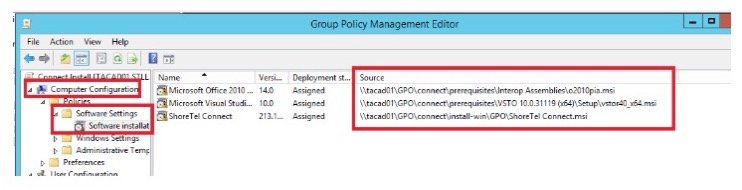
7. Note: ensure you do not browse to the local file for the package. You will want the UNC Path as seen below.

8. You have the option to create a unique organizational unit to control which PCs have this software installed. The example below includes an OU named "Desktops" which the GPO is linked to by right-clicking the created OU then selecting "Link an Existing GPO". Can you customer this to your environment's needs.

9. At this point you can reboot the test PC within this OU to validate the software is successfully installed upon boot up.